It's Not Called Toddler Weight...


If your baby's first birthday has come and gone, but the weight hasn't - you've come to the right place.
Showing posts with label recipes. Show all posts

Monday, June 27, 2016

Summer, summer, summer time! Updates and recipe!

Happy Monday! The weather is lovely here in Connecticut and it's officially Summer!

When it's warmer, I naturally tend to lighten up my diet - I started with some spring cleaning of all the things, including my diet and body.  I had been running about 3 times a week pretty consistently and re-started Kayla Istines BBG program.  For the life of me I just couldn't stick to it.  I'm continuing to eat THM style but have strayed and crossed over but am still consistent with my weight.

A few months ago now, I went to lunch with my cousin at a restaurant called Brio Tuscan Grille. I had a quinoa chicken dish that was delicious (Note: it was not entirely on my Trim Healthy Mama diet since I don't know the exact nutritional content).  Of course, in true Carly fashion I decided I needed to somehow re-create this deliciousness at home! 

So I opened the pantry and the fridge and used what I had and pretty much came up with something new. And today, made it again because it's SO delicious, simple and healthy!!

Recipe: Bowl of Goodness - THM E

Ingredients:
Spinach, arugula, or greens of choice (I highly recommend the arugula! I was out but plan to use next time)
Chopped veggies: cucumber, tomato, red onion, peppers - your choice! You could add a small amount of carrots since this is for an E setting 
1/2 cup cooked quinoa
1/4 garbanzo beans (chick peas)
Grilled chicken breast
Juice of one lemon
1 TBSP feta cheese (more if lower fat)
1 small drizzle of olive oil 
Salt & pepper to taste - may also add other spices if desired like garlic or onion powder

Directions:
1. Grill chicken and cook quinoa per the package directions and let cool.
2. Drain garbanzo beans and measure out portion for one salad (or use full can for two servings)
3. Wash and prepare greens and veggies.  Chop and set aside.
4. Mix greens, chopped veggies, beans, feta and chicken in large bowl.
5. Juice the lemon, add the olive oil and spices and whisk in separate bowl.
6. Pour liquid mixture over salad, combine and enjoy!


Add greens to a large mixing bowl

Chop and measure all the ingredietns

All mixed and ready to eat

YUM
I could eat this pretty much all day, any day! It's light, refreshing and filling.
It's also super easy to make and quick for me to take along with us to the pool we go to every day.
Salads are my main lunch most days.

Let me know if you decide to make this!
~Carly

Thursday, February 4, 2016

Recipe: DIY "Farmington Valley Salad" - THM (E)

Well helloooooo.

Yes, yes - I took another hiatus but I'm back and I promise you won't be disappointed with this recipe I've returned with! 

But first a quick update with where I'm at. I'm bouncing a bit weight-wise but still feeling really good. I'm taking my Juice Plus every day and using my Complete shakes sparingly as I'm going to do the D14 in a few weeks again! I'm staying as much gluten and dairy free as I can and I have to say it's keeping me feeling deflated most of the time which is great!! 

Ok enough about that. On to this new salad I'm obsessed with. Not sure I've mentioned this before but I grew up in Farmington, Connecticut. There's a bakery in the corner as you come into our town and it was called Ann Howard's. It's now called Truffles and they also have a location in Avon, CT which is where I first had the Farmington Valley Salad with my BFF, Dana.

It's delicious! And of course a salad made by anyone else but you always tastes better - am I right? Yes - it's just true. Since I live close to the area but not quite close enough to get this salad as often as I crave it I decided to experiment and create my own. 

Well, clearly certain ingredients aren't hard to re-create...ya know like lettuce. Heh. Sorry - I'm silly. However it's always the dressing that is the hardest to re-create. But thanks to the wonderful world of people on Pinterest I found a really great recipe for the balsamic dressing that I love!! Yay!

So here is the recipe for the dressing from Brianne at Cupcakes and Kale Chips.
 
I'm just going to tell you now to double the ingredients because you're going to be sad when it runs out. Trust me. Speaking from experience here :(

I used 0% plain greek yogurt and only had regular yellow mustard.  I added garlic powder to mine as well. I whipped mine up all in the food processor.

For the ingredients for the salad, you'll need:

1. Any kind of lettuce or greens you like.  Here I used romaine and baby spinach.  The salad at Truffle's comes with mixed greens so next time I will make sure I use those :)
2. Grilled chicken
3. A handful of red grapes sliced in half
4. A pinch of dried cranberries
5. A tablespoon or two of feta cheese or any other type of hard cheese (remember for THM it's an E setting so have to watch the fat grams!)
6. 1/4 to a half of a granny smith apple chopped
7. The delicious, glorious, creamy balsamic dressing recipe
Note: The original salad comes with sliced almonds but I omitted them because I had none and I kept the fat content down for the Trim Healthy Mama E meal.
 

Put all the ingredients in a large mixing bowl to toss
 

All tossed with the dressing - snapped the pic while eating!
This salad is colorful, crunchy and just so tasty.  I will definitely be making this quite often.

For THM it's an E with the added fruit and the lower fat dressing.  Be mindful of the honey in the dressing, too.  I tolerate it well but you can add any sweetener of your choice if you do not wish to use honey.

There you have it - let me know if you make it and what you think!
~Carly

Tuesday, December 22, 2015

Recipe: Chocolate Caramel "Crack" (THM - sort of)

Hello! Happy Tuesday night!

A few years ago, a neighbor made the most amazing creation she called "Christmas Crack" which was essentially butter, sugar, saltines and chocolate. What's the big deal with those ingredients. Don't be fooled - when combined it is the most delicious thing I have ever tasted. For real. It's sweet, salty and crunchy. 

Fast forward to now and being on THM I haven't had it in a very long time. In fact, Ifortunately hadn't even thought about it until it started popping up in my newsfeed on Facebook and on Pinterest. Ugh. 

Then a few weeks back in the Trim Healthy Mama groups page the lovely Briana Thomas posted her own recipe. So immediately I pinned it and looked at it but honestly it was a little too involved for me and I moved on with my craving.

So tonight while grabbing some items out of the pantry I noticed a package of wasa crackers and I decided to experiment.

I grabbed some foil, the wasa crackers, my THM super sweet blend, a stick of butter and vanilla and went to work.

I quickly searched for a recipe and found this one from Smitten Kitchen - http://smittenkitchen.com/blog/2009/04/chocolate-caramel-crackers/

So I followed the directions loosely.

I didn't make a full recipe so I halved it. I spread about 9 crackers on the foil and preheated the oven to 350. I added the stick of butter to a saucepan and added about 1/3 cup super sweet blend and stirred. However, it wasn't thickening or coming to a boil. Seeing as how the real "Christmas Crack" calls for brown sugar, I didn't have any or any THM brown sugar. So I cheated a bit and added two small teaspoons of regular real sugar. As soon as I did the mixture came to a rolling boil and simmered for a few minutes. Then, I added the vanilla and poured over the crackers and spread with a spoon and popped the tray in the oven. After about 8 minutes it was ready with the edges turning brown and I sprinkled dark chocolate chips on top. I use the Enjoy Life brand. However, I didn't have enough so I did use some Nestle tollhouse chocolate chips I had on hand to fill in some gaps. These are clearly not on THM (hence the name of the post) but I figure it's better to have a smidge of real sugar than to indulge in completely off plan foods.

After the chips sat on top and melted I spread them around with a spatula. I sprinkled the top with some coarse sea salt and popped it in the fridge to cool.

Then I proceeded to open and close the fridge numerous times waiting to be able to taste it!! 


Finally, after an eternity - or about 15 minutes - it cooled enough for me to taste to make sure it was going to be good enough to satisfy my craving.

Oh, you guys. It was AMAZING!!


I popped it back in the fridge to cool a bit more and then broke it into pieces. 

And of course I continued to taste test. Even my son wanted a piece. I'm not going to lie - I hesitated to share! Haha but like a good mom I let him have a piece (a small one). He loved it!

This recipe is definetly a keeper. And while I did use some off plan ingredients, this hit the spot and I don't feel bad at al for having this along with my S meals!
~Carly


Wednesday, November 11, 2015

Recipe: Hearty Chili - E

Good morning! It's a rainy Wednesday here. I'm sipping my coffee and decided I needed to share a recipe I've been making for some time now. Since it is getting cooler here, For the past few I've been naturally craving heavier comfort foods like stews, soups and chili. 

Enter my concoction of chili - full of whole foods rich with texture and flavor.

This is considered an E meal for those following the Trim Healthy Mama Plan.

Hearty Chili 

Ingredients:
1-2 tablespoons of olive oil
1 tablespoon of minced garlic 
1 medium yellow onion roughly diced
1 package of ground turkey, chicken or (browned and rinsed) lean ground beef
1 can of black beans drained and rinsed
2-3 medium sweet potatoes pre-cooked and cut into cubes
1 box Pomi chopped tomatoes
1/2 cup quinoa (cooked separately)
1 can of diced chiles
2 tablespoons of chili seasoning
2 tablespoons of cumin
1 cup (or more for more or less liquid) of chicken or vegetable stock 
Salt and pepper to taste

Directions:
1. In a larger stock pot add the olive oil to heat. Add garlic and simmer for a minute. Grab a second soup pot and begin to cook quinoa per the directions on the package. Then, in chili pot and onion and cook until softened.
2. Add ground meat of choice. Once browned add cumin and chili and stir well.
3. Add the tomatoes, diced chiles, broth and beans and stir to combine. Simmer for about 10 minutes.
4. Add cooked cubed sweet potatoes and quinoa. At this time you can also add more broth to increase liquid.
5. Simmer on low for as long as you'd like - I do another 15 minutes or so.

It's really delicious and hearty without being heavy. You can top it with a sprinkle of shredded cheese as added fat if you're following THM. If you aren't, feel free to add sliced avocado, sour cream or a side of tortilla chips - the choice is yours!

I shared this recipe with a few friends now and it's gotten great reviews! 

Enjoy and as always comment if you decide to make it!

~Carly

Sunday, July 26, 2015

Recipe: A Summer Quiche

Hello! Yes, yes - been some time again since my last post. But I promise this post will surely make up for my lack of posting. Last weekend I was blessed and fortunate enough to go away with my friend to her family's home on Shelter Island in New York. It was the second year in a row I've been invited and it's just a rejuvenating and wonderful experience. The home is beautiful and just amazing to be there. Truly.

A view I captured from Sunset Beach on Shelter Island, NY
While we were there, my friend Tracy made us breakfast each morning and she came up with this amazing quiche that I replicated last week (minus a few ingredients). It's got a fresh take and an ingredient you just may not ever think to include in a quiche but I assure you it's deeeeelish!

And fortunately two ingredients now are in full swing this summer season and you can likely grab them at your local farm stand or farmers market: zucchini and tomatoes.

Yep. That's right zucchini and squash.

What?!?! you say?  Yes.  So did I. Until I tried it and it was the best tasting quiche I think I've ever had. So run to the market and grab some squash, zucchini and tomatoes and whip this up.  I promise you it does not disappoint.

Oh, and for my fellow THM-ers this recipe would be an S.

Ingredients
1-2 medium sized zucchini or summer squash chopped (last week I used both yellow and green squashes but this week I only had green)
1 medium tomato chopped 
1 or 1/2 large yellow onion chopped 
Fresh basil (if possible) chopped
Dried oregano to taste 
Salt and pepper to taste
1 tablespoon of butter or coconut oil
Non stick spray or butter for pan
5-6 large eggs 
1/2 cup of heavy cream or 1/2 and 1/2
1 cup of shredded cheese - I used a Mexican blend but mozzarella or any of your choosing will do

Directions
1. Preheat oven to 350 degrees. In a skillet place butter or coconut oil and heat onion and zucchini until softened. Add tomatoes half way through just to soften.
2. Add herbs, salt and pepper to veggies.
3. In a large mixing bowl scramble eggs and combine cream. Then, add shredded cheese.
4. Spray or coat round baking pan or dish with nonstick coat.
5. With a slotted spoon, transfer veggies to the large mixing bowl - the tomatoes and veggies can leave liquid which you do not want in quiche! Mix well.
6. Pour all ingredients into baking pan/dish and bake for about 30-40 minutes depending on your oven and baking dish.

Softening the veggies 

Add the tomatoes last to soften - drain with slotted spoon
All mixed up and ready to bake

Ready to cook!  I can't hardly wait to eat this

Ta-dahhh! Done.  Oh and I made my husband a ham and cheese quiche too :)
So, what do you think?  So easy and fresh and a fantastic way to get in some additional veggies.  You could add anything else to this also - bacon or any other veggies you have laying around. 

I hope you have a great Sunday!  Now, onto laundry and cleaning.  
~Carly

Friday, May 29, 2015

Recipe: Refreshing Quinoa Salad (THM E)

Happy Friday! 
Whew - is it just me or was this a long week? Either way, TGIF for sure.

On my to-do list was grocery shopping but kind of fell to the wayside. My son is no longer in preschool every morning and today we had a park play date with some friends. Since I was out of grilled chicken or deli meats (and pretty much everything else) I opened the pantry and fridge to see what I could make last minute.

Enter this refreshing quinoa salad - oh it doesn't disappoint! Each bite is a burst of sweet, crunchy, lemony goodness. I promise!

I' m just going to throw it out here now - I'm a culinary genius. Just for today. Seriously.

Grab your grocery list and add this ASAP since I'm totally making it again for next week, too! 

Ingredients:
1 cup cooked quinoa (cooled)
1-2 tbsp olive oil
1 lemon juiced
1 can garbanzo beans
2-3 stalks celery diced
1/3 cup diced red onion
1/2 large cucumber diced
6-7 stalks of kale (with stems removed and leaves chopped)
1/4 cup craisins 

Directions:
1. Cook quinoa according to directions and set aside to cool. (Since I was in a rush I threw the pot in the fridge!)
2. Drain and rinse garbanzo beans and set aside.
3. Dice onion, celery, cucumber and kale and throw them in a large bowl. 
4. In a smaller bowl, add the olive oil Amd lemon juice and whisk together. 
5. Once quinoa is cooled, add it to the diced items in large bowl, add garbanzo beans and toss together.
6. Last, pour lemon/olive oil over mixed items and stir gently to coat or combine.
Then, enjoy!


I'm going to admit I wasn't sure how this would all turn out as far as taste goes - but yum! This could easily be eaten without anything else (like I did today at the park) or it would be fantastic as a side dish to grilled chicken, a white fish or even over a bed of lettuce or spinach! 

You can add, change or omit ingredients to your specific tastes. Green apples could be added for some extra crunch too! 

I would say this recipe makes about 4-5 decent sized portions. You could easily double the recipe. In fact, this would be a great side dish to bring to a summer barbecue or just to make and keep in the fridge. I actually can't wait to have some more possibly with dinner tonight.

For THM, this recipe would be considered an E meal because of the quinoa, beans and limited amount of fat from the olive oil.

Let me know if you do decide to make it and if you make any tweaks!

Have a great weekend!
~Carly

Friday, February 27, 2015

Recipe: BBQ Chicken "Pizza" (THM S)

Ahhhh it's Friday. 

Each week have been trying to do family movie night and we do home made pizzas. I buy or prepare dough for the kids and my husband and I would make speedy thin crust pizza for myself. 

But tonight I missed pizza - like real pizza. With good toppings. 

But then I thought about it and what I really missed was the idea of the convenience of takeout pizza. You order it, pick it up (or have it delivered), eat and boom - done. But then I remebered about how it made me feel after I ate it. 

And then I had an idea and decided to make something else super easy - and faster than takeout. This is something that I find I can do successfully now after being on THM for over a year. I know how good I feel when I eat "on plan" and when I eat foods that aren't I'm miserable. Both in regards to my body, mood and on that's always reflected on the scale. 

And since I did an hour long spin class tonight and have had a pretty good week eating and exercising I didn't want to blow it eating "real" pizza (which isn't a favorite of mine anyways).

So I decided to make a different type of "pizza" that I learned from Trim Healthy Mama that literally takes minutes to make. By using low carb products as a crust and toppings I am able to make a delicious concoction so I truly don't feel like I'm missing out. 

I have no idea what made me think of it but I tonight I wanted BBQ chicken pizza. So that's what I made.

I used Joseph's brand pitas which I cut I half. I microwave it for about a minute to harden it a bit and set it on the foil and get it ready for toppings.


Disclaimer: there's a recipe in the book for bbq sauce which tonight I had none of the ingredients needed so I used a low sugar bbq sauce instead. So next time I make this I will be more prepared but in a pinch this will do. 

I topped the pita halves with some red onion, roasted red peppers and took a few handfuls of rotisserie chicken tossed very lightly with the bbq sauce. I spread a small amount of sauce on the pita halves and added the chopped up toppings.
To finish, I used Mexican blended cheeses and mozzarella. Bake in oven for about 4-5 minutes at 400 degrees.


OH-EM-GEEE

This was seriously SO good. I added a few handfuls of spinach as a side salad with some balsamic dressing and it was just perfect!

Yum. 

For THM this version would be an S because of the cheese and the dressing I used. If you used less cheese it could be FP- especially if you use Mrs.Criddles Kitchen's recipe for bbq sauce which can be found here: http://mrscriddleskitchen.com/thm-bbq-sauce/

Hope you all have a great weekend!
Now, off to watch the movie :)
~Carly


Friday, October 3, 2014

Recipe: Apple Cake

Hello!  Long time, no post (again).

Anywhooo - Fall as arrived and we took full advantage this past weekend and went to Pumpkintown, USA here in Connecticut followed by some apple picking.

I scored some white pumpkins at the farm and then this week I found a cute "Give Thanks" sign at Target to enhance our family room decor - which can totally apply to both Halloween and Thanksgiving. Multitasking!  The leaves and foliage are really starting to come out and I'm loving Fall - in case you couldn't already tell.
My Fall Mantle - not done yet!

If you've visited here before, you may know I'm following the Trim Healthy Mama way of eating and I have had some great success lately after some pounds creeped back on over the summer and vacation in August.

I'm happy to be back on track and at an almost all time low weight and smaller inch-wise after I finished a three week Fuel Cycle.  I'm happy to report that I'm currently wearing today a pair of true pre-pregnancy pants - cute capri pants I haven't worn since ohhhh 2007 maybe?! I'm SO happy to see my efforts on the scale and in my clothing and how things are fitting!

However, this post is a recipe post so I'll post a full and detailed re-cap on that soon enough to share with you.

Onto the apple recipe!

I came across this recipe from Julia's Album somewhere (Facebook or Pinterest maybe? I get around...the Internet...hah!) and decided I needed to use up some of these fresh apples we picked.

I modified it to my THM guidelines and this would be considered an E (Energizing) dessert or snack.
So again, not my recipe but tweaked for my purposes!

Apple Cake - THM version
This recipe could also be gluten free if you use certified gluten free oat flour or grind your own gluten free oats!  The apple sauce and greek  yogurt make this cake very tasty and light!  
Ingredients:
  • 3 medium apples, peeled, cored, and chopped into chunks
  • 1 teaspoon cinnamon
  • 4 tablespoons brown sugar (NOTE: you can use a THM version of Gwen's brown sugar but I used a tiny bit of real brown sugar but it's up to you!) 
  • 1 and 1/4 cup oat flour
  • 1 teaspoon baking powder
  • 1/8 teaspoon salt
  • 1 cup on plan sweetner - I used a combination of Truvia and pure stevia extract (original recipe called for 1 cup regular sugar)
  • 1/2 cup apple sauce (original called for oil)
  • 1/3 cup Greek yogurt
  • 1 teaspoon vanilla extract
  • 3 egg whites (original recipe called for 2 eggs)
Directions:
1. Preheat oven to 350 degrees and also grease a square pan - 9 by 9 or 8 by 8 is good
2.  In one bowl combine chopped apple pieces and cinamon and your choice of brown sugar - real or THM version. 
3. In another larger mixing bowl, combine oat flour, baking powder and salt.
Half the batter and half the apples
4. In yet another bowl - sorry for all the dirty dishes we are creating! - whisk together the sweetner of your choice, apple sauce, yogurt, egg whites and vanilla extract until combined. 
5. Add the dry items into the wet ingredients and combine completely - don't over mix!
6. Take about half the batter and pour into greased pan and take half the apple chunks and pour on that.  Then, layer on the rest of the other half of the batter and then top again with the other half of the apples. 
7.  Bake for one hour.

It smells soooo deelish in my house right now!  I can't wait to eat this recipe!  And a food blogger I clearly am not so I do apologize since as I am baking I'm all "oh hey, I should snap some pictures."


Finished baking!  Yummm


A food blogger wanna be I am - hot and fresh apple cake!

Wow, this does not disappoint!  It's warm, apple cakey goodness.  A must-make for sure!
Enjoy!
~Carly

Friday, August 15, 2014

Recipe: Roasted Eggplant and Red Pepper Spread/Dip

Wow - two months off and then two blog posts in one day?!?! Who am I?

Well, this recipe has been on my mind since my lovely friend Tracy made it and brought it to share one day at the pool club.  It is so yum. Then yesterday she dropped off a lovely eggplant for me and some red ripe tomatoes from her family's garden and I knew I needed to make this dip.

And, you already know I love eggplant so this was a no-brainier for me to make.

I found this recipe from Ina Gartner and I omitted the tomato paste.  However, next time I'd probably add it as it would give a little more substance to the dip itself.

A food blogger I am NOT but here are some pics regardless. Humor me  :)

All chopped and ready for olive oil, salt and pepper
My mom bought me these awesome grinders from Traders Joes
Ready to roast
Amazing how much it shrinks when it cooks
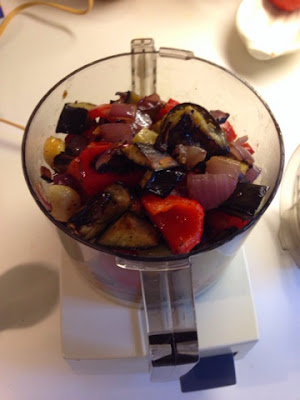
Into the food processor
All blended
Taste testing with a Wasa for all my fellow THM-ers!
I'd say this recipe is a win. I plan to make it quite a bit.  This is also THM friendly - I'd say it may even be used in an S or E setting depending on how much olive oil you use and how many servings you eat.  I bet it would be heavenly with Lavash Crackers or even as a spread on some of Gwen's Bread.

Oh boy...now I need to whip up some of that this weekend.  Happy Friday!

~Carly

Thursday, April 17, 2014

Coffee Cake Confessional

Hey everyone!

Things have been great around here!  My kids are off from school this week and even though they aren't in school all day or full time it's still been a long week.  I had been going to the gym or exercising at least 2-4 times a week and sadly this week I have yet to do any real cardio aside from walking around the neighborhood chasing my kids on their bikes.  Hey, still counts somehow.  At least that's what I'm tellin' myself.  I'm heading to the gym tomorrow morning for sure - get my spinning class fix!  Really, I may be addicted.

As you can see from the name of the post I have a confession.  And also, I've been eating coffee cake.
Delicious coffee cake.

Yep.
Mmmmm.

Sorry.  Thinking of yummy cake.  We'll get to that in a minute. But first, the confession.

A few weeks ago I did a Week Long Fuel Cycle on my Trim Healthy Mama diet.  After the third Deep S day I had reached an all time low weight of 158.4.  Sadly, the pounds creeped back up and I was back up to 159.6.  This morning my scale was 160 and was even a little higher a few days ago.

Before you start thinking "Wow, what a bummer" or "Aww, that stinks!" I shall stop you there.  I'm actually really okay with this number.  I recently shared my update on where I am in my journey on this diet - losing 9 pounds since starting.

Then, last week I found a notepad and my tape measure in my bathroom drawer with some numbers on it.  Right before or maybe shortly after starting THM in December I had written down my measurements - bust, waist, belly, hips and thigh. So I thought, hmmm maybe I should re-measure.

Well I'm glad I did.  Turns out I lost 13 inches!  No wonder I look like I may have lost more than "only" 9 pounds! (At least that's what I've been told)

I couldn't believe it when I added up and calculated all the measurements.  I added it up four times to make sure it was accurate with a calculator.  Yes, I used a calculator.  No judgement!  I'm terrible at math.  Any math.  But, I can tell you I certainly don't need a calculator to tell me that Trim Healthy Mama is working.  Nine pounds and thirteen inches - GONE.

Buh-bye.

That is why I'm okay with being up a pound on the scale.  I'm learning to focus on the non-scale victories which are just as, if not more important than what the scale says.  I feel great, I've lost a bunch of fat, my clothes fit better, I'm more toned, I look better and I'm literally shrinking.  I slipped on a pair of true pre-pregnancy jeans the other day and wore them for the first time in 5-6 years. Considering I never thought I'd be 160 pounds again - EVER, I am so thrilled with where I am physically and emotionally right now.

Okay - enough confession time.  On to the Coffee Cake.

This is not my recipe. It belongs to the lovely Rohnda Sue.  She has a recipe for this coffee cake that is just beyond delicious.  I had seen it a few weeks back and came across it again on Facebook and decided to make her single serving version.  I was craving some sort of baked-yummy-good-muffin-type-thing that wasn't chocolate.  I've been eating chocolate for quite some time now and just craved something else.

So, I made it. Oh.My.Gosh.  With a few substitutions based on what I had on-hand, it was so delicious I almost ate it all before I could snap a picture.

Aside from the horrid scratches on my plates - just look at it!

Glorious coffee cake muffin
It was so crazy good.  The directions were easy to follow and I made a few tweaks.
First, I doubled this recipe to make this large muffin.  Second, I used almonds for the topping instead of other nuts - walnuts or pecans would be delightful.
Third, I used vanilla extract and caramel extract.
Lastly, since I doubled the recipe I only used one TBSP of the coconut flour and substituted the ground flax instead since coconut flour is highly absorbent of liquids in recipes and I like a fluffier texture. I find coconut flour to be very dense in recipes.

So yummy!
Then, today I got greedy.  I thought I'd make myself another muffin for a snack.  Then I sadly thought to myself, but what happens when it's gone?  Should I make two so I have another for later another day?

So, I made the large version.  A whole 8x8 cake of coffee cake gloriousness.  Yes. It's a word.
Again, I used less coconut flour and more ground flax meal and the almonds on top. However, this time, to go with my almond flour and almond topping I used almond extract instead of the caramel.

The full cake version I made today
Yowza.  Take a peek....it's okay if you drool. I am.  I literally just made this cake and haven't had it yet which is killin' me!  But my house smells fantastic right now!


Again, this is not my recipe - it's by the amazing Rohnda Sue and her single serving recipe is on her Facebook page.

~Carly

Friday, March 14, 2014

Recipe: Eggplant Parmigiana - THM style (S)

Hello! Sorry, I fell off the blogging bandwagon. But I'm back with a yummy recipe! That makes it all better, right?

I love Italian food. Well, I love all food, actually - but last night I made a pasta dish for my family using regular pasta. Pre-Trim Healthy Mama I would have easily had a bowl full and maybe more. So in keeping with the Italian theme for the evening I made myself some eggplant parmigiana. 

I didn't actually measure all the ingredients and just kind of winged it.  There's no exact science - as your using the "breading" mixture and find you're running low, just throw some more ingredients in the bowl.  Scroll down for the pictures I briefly snapped as I cooked.


Ingredients:
One large eggplant (or more depending on family size)
Almond meal or flour
Flax meal
2 eggs whisked
Oil for frying - coconut or olive oil - your choice!
Italian seasoning
Garlic powder
Grated Parmesan cheese (optional)
Tomato sauce of choice (if on THM make sure it's a no-added sugar sauce)
Shredded Mozzarella cheese

Directions:
1.  Wash, dry and then slice eggplant into 1 inch wide (or less) sliced pieces.  I usually don't use pieces towards the very top or very bottom of the eggplant - but that's just me.
2.  In a larger bowl combine about one cup of flax meal and a half cup of almond meal or flour.  Add Italian seasoning such as oregano, basil and parsley flakes to your mix and garlic powder to taste.  You may also add grated Parmesan cheese also for more flavor.  Be sure to combine well.
3.  Pour choice of oil in pan and begin to heat. Use enough oil to cover the bottom of the pan and give a good amount of liquid for the eggplant pieces to fry in.
4.  At this time you should pre-heat your oven to 350 degrees.
5.  In another wide opening bowl, whisk the two eggs together. Check to see if oil is heating up nicely.
6.  Submerge each piece of eggplant in the egg and flip to get both sides covered and then coat in the flax, almond meal, seasonings mix.
7.  Place in oil for about 3 minutes on each side or until golden brown. Transfer to a plate with paper towel to absorb excess oils.
8.  Repeat egg and "breading mix" and frying until all pieces of eggplant are done.
9.  Take a large baking dish and place a small amount of sauce on bottom of it.  Begin layering the eggplant on top of the sauce.  Cover each piece of eggplant with some sauce on top.
10.  Cover with foil and bake in oven for 25-30 minutes to further soften the eggplant.
11.  Remove briefly to top with shredded mozzarella cheese to your liking and place back in oven to melt.


Sliced eggplant

Mixing up the "breading"

Fried to perfection!

Add a bit of sauce

Topped with cheese and voila!

Serve with Dreamfields pasta, a large side salad or any other veggies you'd like.  This recipe is a keeper for sure!

I plan on posting an update on my personal weight loss journey shortly.  No really, I promise! Soon!
~Carly

Thursday, February 6, 2014

Recipe: Veggie Bean-Quinoa Soup - THM E

Good morning!  After yet another snow day yesterday during this colder-than-normal winter here in Connecticut, I can help but continue to crave warm, hearty soups.

I didn't see this recipe made anywhere and I kind of just made it up on my own. It's definitely not genius or anything. 

But it is so good.  

There's nothing fancy in it and you can really add anything you have in the pantry or fridge that needs to be used up. Substitute or leave out ingredients based on your dietary needs or tastes.  For THM-ers this soup would be an E.

I call it Veggie Bean Quinoa Soup.  This recipe makes about 2-3 quarts of soup.

Ingredients:
1 Cup of purified water
1-2 box containers of veggie stock 
1 box Pomi diced tomatoes 
1 can of kidney beans
1 can of white beans (Canellini are my favorite but use whatever)
2-3 stalks celery chopped (I include the greens in the inside of the celery for more flavor)
1 carrot chopped 
1/2 of an onion chopped
1-2 green zucchini chopped
1-2 yellow squash chopped 
1/2 cup quinoa (cooked separately and add at end of soup cooking) 

Directions:
1. Rinse and chop all veggies.
2. Rinse and drain beans.
3. Pour cup of water, veggie stock, tomatoes and add all chopped ingredients and beans into a big stock pot.
4. In a separate smaller saucepan, cook quinoa according to the directions on your package. I use water to cook my quinoa but feel free to use any broth of flavoring you like.
5. Cook soup on medium-high heat until you achieve a rolling boil.  Turn down to low and simmer until veggies are tender - approximately 25-30 minutes.
6. Add cooked quinoa to rest of the soup.  Stir, add extra spices to taste and serve.


Veggie Bean Quinoa Soup.  Deelish.

This soup could not be easier.  Again, it makes quite a bit of soup so feel free to share with family, friends, neighbors or co-workers!  I gave a quart of soup to my neighbor the other day when her kids weren't feeling well and she raved about it.  

Let me know you like it if you try it and any variations you did!
~Carly

Tuesday, January 28, 2014

Recipe: Noodles and Peanut Sauce - THM S

Hello!

The other day, my mom and I were talking about food (as we often do) and we both suddenly remembered a favorite dish at a restaurant that no longer is open. It was a Chinese food restaurant and we went there all the time.  Specifically, we loved the cold noodles with peanut sauce. They were so good! 

Now that I'm on my Trim Healthy Mama lifestyle, I was determined to make this one day again using on-plan ingredients. 

Well, that "one day" was this past weekend.  I found this recipe and pinned it on Pinterest and used that as my guidance and just adapted it to my current dietary needs for THM.

So, really quick a little note about the use of Dream fields pasta - you can only retain the low glycemic impact of the carbs if you cook it according to the box AND you can never reheat it. Otherwise, it turns into regular pasta and the whole point of using it is gone. To be safe I always under cook mine to be extra safe :)  And, the great news about this recipe is you can eat these again the next day as cold noodles!  So go ahead and make a double recipe and have lunch for the next day!

Onto the recipe!  Again, this is not my recipe but I've adapted it for Trim Healthy Mama.  

This recipe would be an S - Satisfying dish.

Ingredients:
Dreamfields pasta - make as many servings of this as you need for your meal
1/2 Cup natural creamy peanut butter 
1-3 TBSP Braggs Liquid Aminos (you can also use soy sauce if you'd like)
1-2 packets of Truvia or on-plan sweetener of choice
2-3 cloves of garlic 
1-2 TSP of lime juice
1/2 TSP of red pepper flakes or more to your taste plus extra for topping
1/2 cup water 
1-2 TBSP of chopped peanuts to garnish 
Veggies - Note:  Add any veggies you have laying around. Tonight I only had carrots and green pepper in the house since this recipe was a last minute choice to make it - but green scallions, mushrooms or broccoli would be wonderful additions for next time! 

Directions:
1. Cook pasta per directions.
2. In blender or food processor combine all ingredients except water and the peanuts for topping and extra red pepper flakes. As you blend, slowly add water as it mixes or else it clumps a bit.
3. Steam or lightly sautée the veggie you'd like to use - I just sliced the carrots and pepper thin and left them raw for this recipe.
4. Drain pasta and scoop in mixed sauce and add veggies back into the pasta pot and mix and re-heat if desired.
5. Serve and garnish with peanuts, red pepper flakes and enjoy.

My THM-approved ingredients I chose to use for this recipe.
The only veggies I had - limit carrots for S meals!
Mixing it all up in the pot.
All the ingredients into the food processor.
Voila!  Dinner is served.  

It was sweet, crunchy, spicy and just delicious peanut-buttery goodness.  Yum! Oh yes,
I'm sooo making this again.

I'm also linked up at Gwen's Nest for THM Tuesday's!
~Carly

Monday, January 20, 2014

Recipe: Broccoli Cheddar Soup - THM style

Hello!  I hope you had a lovely weekend and Monday!

I've got a recipe that I THM-ed over this past weekend.  I used to make this soup about once a month or so. For the record, it's NOT my recipe - however it is adapted from Lu Lu The Baker's blog from her post called Cheesy Vegetable Chowder.


When made per her instructions, it is completely deelish. Unfortunately, it's just does not fit the THM standards I am currently following. But have no fear.  I tweaked it a little so I could have one of my favorite soups.  For the recipe as written below, it would be an S recipe.

Ingredients:
2/3 C half and half or cream
4 C chicken broth or stock
1 C chopped celery
2 C chopped broccoli
1 C chopped carrots (use sparingly in an S meal)
1/2 C chopped onion
1 C chopped cauliflower (in place of white potato)
1 TBSP minced garlic
1/4 TSP Xantham gum (to thicken in place of flour)
2 TBSP Butter
2 C cheddar cheese (or more or less)

Directions:
1. Chop up all the onion, carrot and celery. At this time you may just want to chop the cauliflower and broccoli too in order to maximize your prep time chopping.
2. In a large pot, melt the butter.
3. Once butter is melted, add the chopped onion, carrot and celery. After about 5 minutes, add the garlic.
4. Once simmering, add the cauliflower and chicken broth. Bring to boil.
5. Add cream and turn down the stove to simmer. 
6. Add broccoli and continue to simmer.
7. Add Xantham gum and stir well. 
8. Once all veggies are softened, add the cheddar cheese and stir until melted. 

After chicken broth and cauliflower are added.

This time I used chopped frozen broccoli but have used fresh in the past.

The finished soup after cheddar cheese is added and melted.

Chow time!  Served with a sprinkle more of cheddar cheese and some homemade bread.

Mmmm - warm, cheesy and chock full of veggies.  I served this with a side of bread from the Trim Healthy Mama book - a recipe titled Golden Flat Bread found on page 270-271.  It's also an S recipe so I can easily pair this with the soup or maybe next time a small salad. 

I'm linked up for the first time over at Gwen's Nest for her weekly round up of THM Trim Healthy Tuesday's posts so head over to check it out!
~Carly